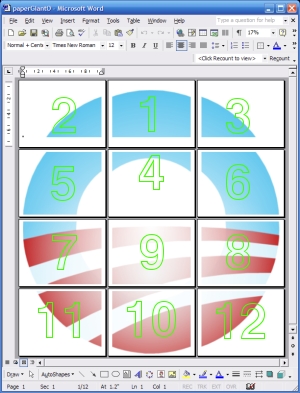
Visual Image of File Output
Download Links
Brief Description of Use
| you should right click over the icon and select “Save Target As”, otherwise the file may open in your browser |
![[MS Word DOC Icon]](./MicrosoftOfficeWordDocumentIcon.gif) 30” Paper Wall Hanging (note: you'll need the Microshaft Office Word program to view this type) |
![[Adobe Acrobat PDF Icon]](./AdobeAcrobatPDFIcon.gif) 30” Paper Wall Hanging (note: you'll need the free Adobe program to view this type) |
![[OpenOffice Writer Document icon]](./OpenOfficeWriterDocumentIcon.gif) 30” Paper Wall Hanging (note: you'll need the free Sun Micro program to edit this type) |
VERY special thanks to Greg Giro of Vermont who suggested getting a Mac compatible solution up here.
This project requires 12 sheets of card stock paper. You will need to do accurate straight line and curved scissor work and tape the pieces of the project together on the back sides.
Note the green numbers on the image to the left indicate the order I successfully assembled the first one.
Folding the sides to the back and then in half putting the top back to back with the bottom makes for nice shipping.
Click this for a clearer view
![[Click here for a larger view]](./P3064075.JPG)
| you should right click over the icon and select “Save Target As”, otherwise the file may open in your browser |
30” Window Decal (note: you'll need the Microshaft Office Word program to view this type) |
30” Window Decal (note: you'll need the free Adobe program to view this type) |
30” Window Decal (note: you'll need the free Sun Micro program to edit this type) |
VERY special thanks to Greg Giro of Vermont who suggested getting a Mac compatible solution up here.
This project requires 12 sheets of full sheet clear label paper. You will need to do accurate straight line and curved scissor work and very accurately set the pieces of the project on glass taking care to not trap bubbles under the film.
Note the green numbers on the image to the left indicate the order I successfully applied ours to the campaign office window.
Click this for a clearer view
![[Click here for a larger view]](./P3064074.JPG)